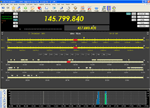
Satellite Data - Generates tracking information and display for selectable (up to 100) satellites.
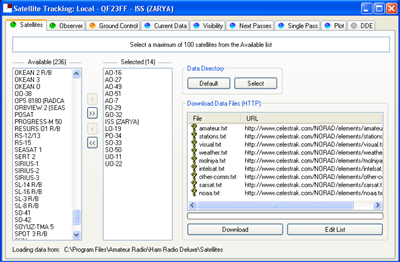 The Satellites tab is displaying some 70 satellites whose data has been previously downloaded via the Download button in the window. The Download Files section if the window displays the satellite files that will be downloaded. The Edit List button provides a Windows Notepad view of the available satellite files and there are a couple not displaying in the window that can be included. Instructions are in the Notepad file and it just requires the removal of the # symbol to include these additional files in the download.
To choose a couple of satellites, click on the name in the left window and then click on the > button to place it in the chosen list to the right. If you change your mind, the < button will place it back again.
To choose all satellites, click on the >> button to place all of them in the chosen list to the right. If you change your mind, the << button will place them all back again. As there is a maximum of 100 satellites allowed, I would expect that the program would only select the first 100. This is unconfirmed.
Finally, there are buttons provided to choose satellite data files from either the Default or another directory.
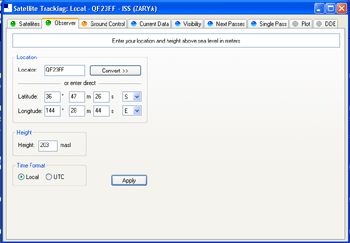 The Observer window is for entering a Grid Square Locator or coordinates as a reference point and will default to your own. The Convert button will convert from one to the other.
Height Above Sea Level in metres and a choice of time displays, UTC or local, is all that remains.
The Apply button will apply the information to the Data Generator.
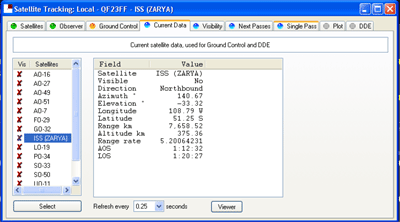 The Current Satellite window shows the satellites you have previously chosen. The ones with the adjacent red cross are not visible. If you click on the name of any satellite, its current data will be calculated and displayed in real time.
A choice of refresh time is provided and the Viewer button will give a Windows Notepad view of the data at the time. This is handy if you want to print it or save it.
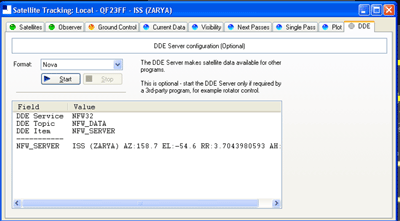 The DDE Data Server window shows the DDE configuration for the currently selected satellite. This function permits the use of Ham Radio Deluxe satellite information by other programs. This window controls the DDE server. If you want to track a satellite with HRD using HRDís data, or use HRDís data with another program you must start HRDís DDE Server. Currently only the Nova format is supported.
Simon has provided complete instruction for using DDE in the Satellites.pdf file. If you haven' got a copy you can download it from http://hb9drv.ham-radio.ch/downloads/.
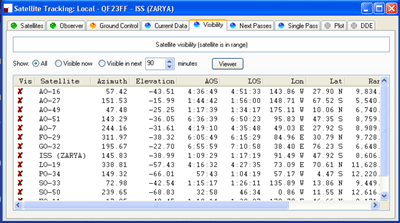 The Visibility window shows current data for selected satellites. There are radio button options to Show All satellites, only those that are Visible now, or, those that will be visible within a selectable range of from 0 to a maximum of 4 characters in minutes.
The Viewer button brings up the displayed data in Windows Notepad for subsequent printing if you want.
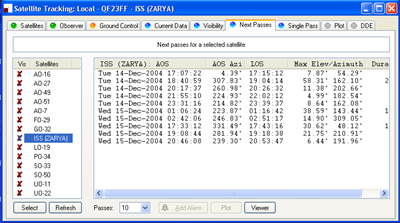 The Next Passes window displays calculated pass information for the selected satellite.
Your chosen satellites will be listed at the left side of the window. The pass information is for a single satellite from the list that is chosen with the Select button. The Show all radio button will show the full list of your chosen satellites where the Visibility list radio button will only show those that have current visibility.
The passes drop down listbox provides a number of choices from 10 to 1000 passes to display.
If you select a particular pass from the list, the Add alarm and Plot buttons become active.
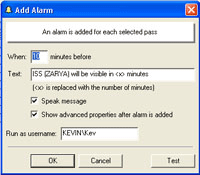 The Add Alarm window allows you to set an alarm (alert) for each selected pass. You can specify the number of minutes before acquisition that you wish to be alerted. Default text of the alarm message is displayed but it can be edited.
There is a checkbox selection if you wish to have the alert spoken and another to show an advanced properties dialogue box after you have set the alarm.
The Plot button will cause the Single Pass window to display a plot of the selected satellite.
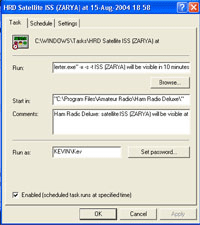 The Task tab of the Advanced Properties dialogue box displays the Alert that will be provided.
Run: will default to the Alerter.exe program and will default to the Ham Radio Deluxe program directory. The comment for the alarm can be edited.
Run as: information can also be edited and a Password can be set but I am unclear as to what the Password applies.
Finally, there is a checkbox that can be checked/unchecked to enable/disable the alert.
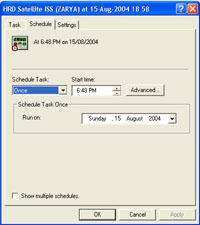 The Schedule tab of the Advanced Properties dialogue box displays the Scheduling of the Alert and, ordinarily, it would be left as is as a satellite will only pass once as alerted.
It appears that the Alerter.exe program may be useful for other things but it wants some text sent to it if you try to start it independently. It may even be used by other parts of the program suite.
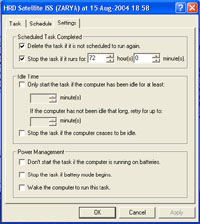 The Settings tab of the Advanced Properties dialogue box displays settings for the alert that has been set up. Without evidence to the contrary, I guess you would normally leave it at its default settings.
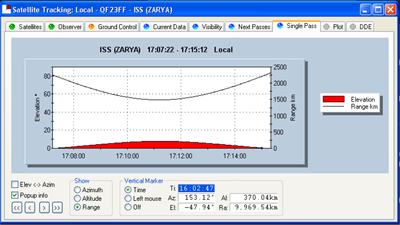 The Single Pass window displays a graph of a selected satellite's visibility. The satellite's pass is first selected in the Next Passes window. The window displays a horizontal time scale at the bottom, Elevation degrees at the left, either Azimuth, Altitude or Range (depending on selection) at the right. The date and time of the pass is displayed at the top.
The Elev <-> Azim checkbox toggles the display of Elevation only or, Elevation and the radio button selection in the Show box - Azimuth, Altitude and Range.
The Popup Info checkbox toggles the display of the information shown over the main view. This information is dynamic (varying) and follows the positioning of the mouse curser to show location information at various points on the pass graph.
The Marker radio buttons have three selections. The Off selection disables the Marker facility. The Track Time option enables the display of dynamic (updated in real time) information relative to the satellite at the current time, just to its right. The Left Mouse btn choice enables the setting of a marker on the display with the left mouse button. The dynamic information display will then freeze with pass details relative to the position of this marker.
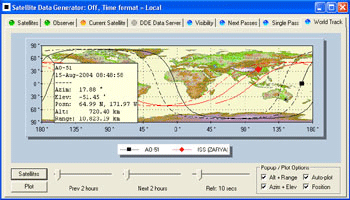 The World Track window shows tracking information for selected satellites, previously chosen from the Satellites tab, on a world map overlay. The solid section of the tracks are past passes and the dashed lines indicate the direction in which the satellite is heading.
The Plot button will force the display to update in between the time ordinary used for refresh as dictated by the Refresh slider.
There are 3 sliders that affect the plot. The left hand slider selects previous plots from 1 hour to 48 hours, the centre slider selects future plots from 1 to 48 hours and the right slider selects refresh periods from Off to every 10 minutes. You can force a refresh within the set time with the Plot button.
If the mouse cursor is positioned on a track, there will be an inset display of tracking information relative to that point on the track. This is shown at the left on this image. The information that is shown depends on the selection of the Popup/Plot options at the bottom right of the window.
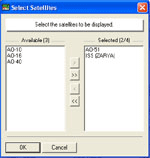 The Satellites button on the main window displays a selection window with your previous satellites choice. You can choose up to 4 of these for which to display tracking information.
Desired satellites need to be moved to the list on the right. To do this, either select a particular satellite and then click the > button or move all satellites (to a maximum of 4) by clicking the >> button.
The selection process is reversible by using the same method but this time select from the right list and use the < and << buttons to move them back to the left list. Click OK when finished and your selections will appear in the main window.
